Monday, May 11, 2009

Still Miss my Camera


This is the Konica Minolta DiMAGE X50, which was a steal for an ultracompact at the time, and was very fast to boot. In insufficient light, the picture quality was pretty bad, with a lot of noise, but this was typical of ultracompacts at the time. It did take some pretty good shots when the conditions were right though. I really miss it. Okay, it's sitting right in front of me, but I think I left the charger at home my mother's house.

Looking back at previous posts, the picture quality was something I took for granted. Of course, many shots could have been better with maybe a little more sunlight and a tripod, but I was lazy.

Anyway, I noticed there was a jack on it, labeled 4.7V DC.

It's pretty hard to see it in this photo, but even if it were working I wouldn't be able to take this shot with the X50 anyway.

So I thought, hmmm 4.7 volts, that's pretty close to 5 volts, which is the USB standard. "Maybe I could charge this thing from a USB port!" I thought.

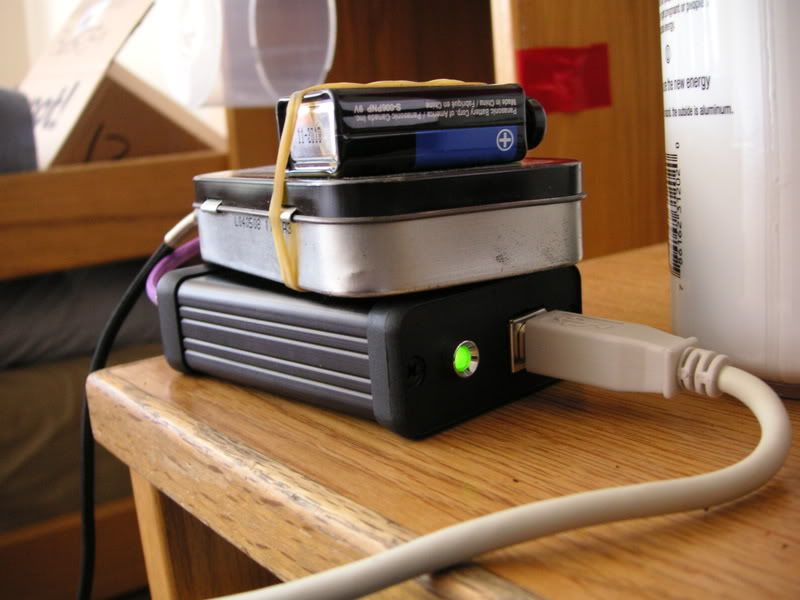
So I went down to the dollar store and then Radioshack and made this:

Well, it didn't charge anything. While hooked up, the camera tried to start, but couldn't. After being connected a while, and then disconnecting, it wouldn't even try to power up. After some googling, it turns out that jack was for an AC adaptor to use the camera off of instead of batteries. It didn't charge the battery. And apparently the USB standard of 100 mA wasn't enough for the camera to run off of (the USB standard allows up to 500 mA, but it must request it from the computer, which may or may not grant the device such current, depending upon the power settings).

I really should have done a little more research before hurrying out the door to Radioshack again. At least this time I saw someone I don't normally see working, all the other times I felt like such a regular.

Saturday, May 9, 2009

Power Supply (for phono stage)

I finally built my electrical engineering course project, it's horrible, I'm not even going to post a decent pic of it. However, it has inspired me to hopefully pursue robotics (BEAM in particular) this summer.
It left my new-old-foundatafreesigninfrontofabankruptbusiness'soldlocation folding table setup a mess (this was an early picture, it got much worse than this).

I should take a full proper picture of it folded up, it's so cool. I wouldn't have finished my project without it, my desk is way too cramped. Here it is, equally flooded with parts and tools and such.

Also, much of the work was done at night, so I would have bothered my roommate much (either with solder fumes, or the cold of having the windows open).

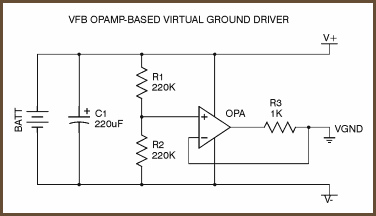
What to do with all my parts and tools out? A power supply for my Very Simple Phono Stage of course! The basis of which is a completely blank 24 V DC power supply from my local electronics store, along with an adjustable regulator, a pot, some caps, etc etc.

It took much longer than I thought. Instead of boring you with circuit details and how I asked the good people of Head-Fi for help, here are the pics.


PSU on the left during testing. The heatsink was remarkably cold during a few hours of operation, which was a relief. It's so small! That huge capacitor is a 1mF.


The blank wall wart. It does its job and gets a little warm. There is a 24v dc regulated Elpacs wall wart on the right, but that is for my PPA :D


And the psu, with the preamp in the background. Notice how I partially wrapped it in aluminum foil for shielding (only the bottom of these enclosures are metal). I swear it sounded better after I did it (okay, I guess I can't really tell since it could be placebo all the same). Linda Ronstadt's voice in particular sounded exceptionally better, as well as Jenny Lewis's. My speaker's strong point is mids anyway.

I love that little fuse holder, and the heatsink, and the toggle switch, everything. It's so cute.

Also, I saw this little gem at Rasputin's the other day. If it weren't for that price tag (it's used), I would have bought it.
Pretty hilarious if you ask me.

I feel so bad with these terrible pictures. I hope my camera charger turns up soon, or else the li ion inside will permanently die D:

Friday, May 1, 2009

Crappy Pictures

I've been meaning to post for some time now, but my camera battery died and I can't, for the LIFE of me, find the charger.

So this update will be mostly full of pictures taken by my phone.

THE VERY SIMPLE PHONO STAGE

I've only been able to listen to my new (old) turntable using my old receiver. I wanted to see if it was holding it back.

So I looked around for phono preamps, so I could maybe plug that into another speaker amp or one of my headphone amps. If I wanted to spend less than $100 I was pretty much limited to DJ models (probably fine, just something in the back of my mind steering me away from anything with the word DJ on it) and cheapos. So, naturally, I searched for DIY solutions. One of the first (edit: the first) results was a thread over at diyaudio about the Very Simple Phono Stage.

It was essentially an opamp, power supply, and a bunch of resistors and caps! The comments in the thread said it sounded pretty good, and the justification included some kind of keeping-it-simple argument, which made sense to me.

I had an extra OPA2132 opamp from my cmoy (since in my cmoy there is now an OPA2107, which sounds much better in that application), and I figured I could just make it battery-powered (using a psu for the cmoy, since I had yet another opamp available) for the time being, since I didn't want to make something that I had to plug directly into the wall. I don't think I'm ready for that kind of thing yet. Also, the toroidal transformer recommended by the author was like $35.

The parts total was around $20, not including the opamps of course, but the resistors, caps, enclosure, sockets, a switch, and some RCA plugs.

I made a test version on breadboard (for my project, which I have yet to complete lolololololololol)


At first it sounded like crap, then I realized the output caps were too small by a factor of a thousand lol. Then I bought nonpolar 4.7uF electrolytics, slapped 'em in, dropped some Empire Strikes Back soundtrack in the Kenwood, and I was blown away.

Nothing I have ever owned has ever sounded that good.

And this was the breadboard version, with all the extra resistance from the mechanical connections, all the extra parasitic capacitance from the untrimmed resistor and capacitor leads, etc etc.

I cased it up yesterday afternoon, and I seriously think I got high off of the solder fumes. Not a good thing. Anyway, here's what it looked like halfway done:


And all cased up:


Instead of making a screw terminal for the grounding wire that all turntables (should) have, I soldered a wire (not seen) from ground and had it press against the metal base. That way, I could just attach the groundwire as shown:


I'm listening to it right now. I've been listening to it for hours. It sounds so good.


Also, I moved my speakers and receiver, they sound much better now! My bookshelf speakers are on a bookshelf lol. And I'm less worried about the music coming from the speakers resonating with the tonearm and creating an ugly feedback sound since they're relatively far away now.


This is my third Spring at college, and every Spring, around the same time (before finals) I've undertaken and finished a project. I guess it's the aggressive procrastination at work :DDDD
From top to bottom, and in chronological order, the cmoy headphone amp, the alien dac, and the very simple phono stage.

Sunday, April 12, 2009

Frankenheadset


Soldered this little number up today so I could stop borrowing a roommate's mic, headset with mic is much easier and more convenient anyway. Mic came from some generic earclip-headset crap I bought in the Philippines way back when, I was much more frivolous with money back then. I never even used the headset (partially because it SUCKED, the drivers at least). The drivers are KSC-75 (clearance, $8), and the headband is Koss KTX/Pro with broken drivers ($1.50). Lo and behold, the KSC-75's drivers fit perfectly into where the old drivers used to be (the old drivers have a strong resemblance to KSC-35 drivers, no pic because they are far, far away.)

Works great! Just started playing TF2, this makes it more fun.

Oh yeah, the soldering was limited to soldering the leads from the headset to some 24 gauge speaker cable to a cheap mini plug. The drivers are attached to the stock KSC-75 cable. I've been wanting to recable it for a while, but didn't care enough to actually buy the materials.

If you look down at the previous post, you'll see that my 21st birthday occurred recently. I came into a little bit of money and bought this.


That pic is crap. Anyway, if you care, yes there is a dust cover. It's not in the best condition so I left it out for photos.

Yes that is the cardboard shelf (shoe-rack lol) from a previous post. After realizing most of the shoes taking up room belonged to only one of my roommates, I got selfish. After all, I made it, why should it be used to hold someone else's shoes? Anyway this is too off topic.

It's a Kenwood KD-44R with an Audio Technica MG200E cartridge. I can find next to NOTHING about either on the internet. From the looks of the cartridge and stylus, and some forum help, apparently I can upgrade to this stylus, which has a shibata diamond tip, as compared to my cheap AT10 or whatever with a conical tip. I was actually considering dropping another benjamin on a new cartridge! 80's Audio Technica cartridges were audio gold, according to some forum posts (don't feel like looking for them now) which said some of them sound better than cartridges selling for hundreds (think 5-8) of dollars today.

Here is the cartridge:

Removing the cart just to identify it was a bad idea, but curiosity got the better of me. It took me quite a while to realign it.

Anyway, I absolutely love this thing. I can't stop using it. It's a good thing this stylus is rated at 1000 hours of use (or so the dealer tells me) because I swear it gets an average of 4 hours a day. That means I have to replace this thing in less than 250 days. That's less than a year, obviously. I want a new stylus anyway.

More pics, this thing is beautiful. Perhaps it is only because I have spent the past week looking at pictures of turntables on the internet.

The old setup in the living room: my receiver is a little shallow front-to-back. The positioning was kind of awkward but the little rubber feet on the turntable (a nice touch!) adjusted well. They are terminated in what seems to be some kind of velvety-soft material.


The new setup in my room. Makes the room kind of cramped, but I tell myself this is temporary. Pictured are the turntable, receiver, my cardboard shelf, the record collection so far (about 13), my pink fake-diamond-encrusted belt (thanks Eve), and my Insignia NSB2111 speakers, which are pretty infamous. The entire thing sounds INCREDIBLE. I don't know, analog is just so much more fun and sounds so much more REAL than digital, more on some records than others though. Hopefully this will change when I upgrade my stylus. My copy of the My Fair Lady soundtrack in particular sounds excellent, even though it may be my oldest record.
If there are any audiophiles reading this, yes I realize how bad a very light cardboard shelf is for a turntable, this is temporary.
It is also a fire hazard, but it is okay as long as I keep everything off while I'm away, I believe.


So shiny! The record is Radiohead's Pablo Honey, 180g.


I love the look of this tonearm assembly. In fact, an edited version of this photo is my desktop background right now. My Alessandro MS-1s are in the background, as well as my roommate's desk.

Monday, March 23, 2009


that's a 4 foot straightedge, and a triangle. FOUR FOOT.

Saturday, March 14, 2009

Remember to properly fillet your joints, kids!

(HAPPY PI DAY!)

The shelf is done. I can't believe it. I was really expecting to procrastinate.

In a way, I was procrastinating by working on the shelf, instead of working on my labs/midterms. Anyway, here are the shots leading up to it:


This is a glue fillet.


Fillet drying. It looks like this shelf was designed by Casa Designs. It wasn't. Kind of funny my random cutting of cardboard worked out that way.


Final panel clamped down after gluing, with the force of THREE CAMPBELLS lol. David donated his international edition paperback Campbell to the cause. Other books helped too (damn Vollhardt).


Goddamn shaky fingers. Anyway, this is one possible configuration of shoes. As you can see I really should have made it ~4 inches wider to accommodate a third pair of shoes in each shelf, but it helps plenty like this.

Final shot:


Man, that was really fun. REALLY. It's like, more relaxed than papercrafting: with cardstock papercraft I had to cut with a precision of 0.2 mm and never ever designed anything myself. My precision is way off with this shelf (sometimes an eighth of an inch off!), not to mention I only have an 18" straightedge, but it works fine. Someday when I have more furniture and I don't care about this piece, I'm going to test it to failure. I wonder if I can sit on it.

I feel kind of empty now. Although it was always a mess in between our living room and kitchen, it was really fun. The thought of always having something to do to this thing was comforting.

I think my room might need some more organising help in the form of post-consumer recycled tree pulp.

Tuesday, March 10, 2009

HOLY CRAP PROJECT

Oh my goodness, I've begun building something. FINALLY.

While it doesn't involve any kind of wiring, soldering, or moving parts, it's a lot harder than it looks.

But first: Some of what I wanted on this blog I've actually done in lab for a class I'm taking right now. Last week I made an amplifier circuit using a dual opamp to amplify a signal from a function generator. It's a shame I didn't take any pics of the breadboard or oscilloscope. Maybe I'll take some next week, where I'm going to be making an AUDIO SYNTHESIZER using the famous 555 timer, an 8 pin IC.

Anyway, onto the project!

This is actually day 3 of it, and I'm doing the least today (I have a 17 page lab due tomorrow and homework, and a midterm Thursday).

It all began last summer when we (my roommates and I) were moving into our new apartment. Moving into a new place usually involves a lot of new furniture, at least if you moved from a pre-furnished dorm. This left us with a LOT of cardboard. I figured, hey, why not save the cardboard? I want to experiment with cardboard furniture. It has been several months and the extra cardboard boxes have been an eyesore that I've made my roommates endure.

So, as you might have guessed, I've begun building a piece of cardboard furniture. A shoe-rack, or a shelf, essentially. Our entryway is cluttered with so many shoes, (and I know we don't use all of them on a daily or even weekly basis, I'm not going to explicitly mention anything more) and simply getting into our apartment can be a hassle at times, tripping over shoes and whatnot.

I've been wanting to do something like this for a while, but I really didn't know where to start with a design. I got some ideas from this instructable.


It gets worse than this. This is when everyone's GONE.

I don't feel like uploading the plans. the next pictures are just progress.

some pieces cut out

Bottom struts inserted

All struts inserted, bottom two rows glued.

Back support glued. Front support in position.

And this is where I am now. Front glued on, two shelf bases glued on. The second shelf supported most of those books on the left (and there's ANOTHER Campbell biology book). They're heavier than they look (especially Campbell, and there's an Ochem book on the bottom).

I guess I could do it faster by using tape (like the instructable above dicates) or hot glue (like this guy). Although it's only going to be supporting shoes, I would like some more strength. Most of the joints (with the supporting struts) are made using small pieces of cardboard folded in half, glued, and then placed as you would normal tape.